The CMS
‣ 1 Content Management System (CMS)
https://yourdomain.companyapp.co.uk
Username:as supplied
Password:as supplied
(this is the same username and password as the app itself)
The Main Navigation has 3 mains elements
Presentations
– List
– Create presentation
Documents
– List
– Upload document
Emails
– List
– Send new
At the top right of the screen the system will show you your login name – with the facility to log out if you need to.
IMPORTANT:There is no auto timeout on your session – so if you access the CMS via a public computer – or any computer where a third party might have access – then please remember to log out to prevent any unwanted access.
Next to your login name you will see the ‘cog’ icon ![]() . Click on this icon and select
‘My Account’ to go to your profile page where you can update your email address, change your password, edit
how your first name / last name appear in the system and also change your phone number, if required. When
you send an email from the system the email signature is auto-filled from the information in this ‘My
Account’ section.
. Click on this icon and select
‘My Account’ to go to your profile page where you can update your email address, change your password, edit
how your first name / last name appear in the system and also change your phone number, if required. When
you send an email from the system the email signature is auto-filled from the information in this ‘My
Account’ section.
‣ 2 Presentations list page
THE SEARCH / FILTERING BAR
![]()
Search title or ID: Allows you to search for a specific presentation by its title or its ID reference
Author: Allows you to search for presentations by their author.
Library: Choose which library you want to see presentations from: the main ‘Core’ library, your own personal ‘User’ Library, or a library of presentations that your colleagues have ‘Shared’ with you.
– All Libraries
– Core Library
– User Library
– Shared Library
Category: Choose which content category you wish to filter the presentations by – you will only see categories for which you have access rights
Status: This is the Publish status of the presentation. Choose an option to only see presentations that have that status:
– All Statuses
– Published (Full)
– Published (Web)
– Not Published
– Archived
(see explanation of publishing below)You need to click the ‘Apply’ button to action the filtering. Use the ‘Reset’ button to cancel the filtering.
THE PRESENTATION LIST ROW

Thumbnail: Shows the reference thumbnail for the presentation.
Title section: Shows the title of the presentation, its reference number, when it was created, how many slides it contains, its file size & its author.
Publishing section: This section shows the current publish status of the presentation, the date when its publish status was last modified, what category (if any) it is in and whether it has been promoted to the main Library.
Publishing status selector:
![]() Published (Full): This publishes the presentation to the web and also makes it available for
download on the iPad.
Published (Full): This publishes the presentation to the web and also makes it available for
download on the iPad.
![]() Published
(Full): If the tick icon is orange then the content is still Published (Full), but the orange colour
indicates that there has been a content edit since the last time the presentation was published. In this
case the latest version of the presentation is not currently available to download to the iPad.
Published
(Full): If the tick icon is orange then the content is still Published (Full), but the orange colour
indicates that there has been a content edit since the last time the presentation was published. In this
case the latest version of the presentation is not currently available to download to the iPad.
![]() Published (Web): This only publishes the presentation for the web for viewing in a browser.
It is not available for download to an iPad.
Published (Web): This only publishes the presentation for the web for viewing in a browser.
It is not available for download to an iPad.
![]() Not Published: In this situation the presentation is considered ‘active’ (being edited) –
but it is not published to the web or available for download.
Not Published: In this situation the presentation is considered ‘active’ (being edited) –
but it is not published to the web or available for download.
![]() Archived: The presentation is considered ‘not active’ and is not seen in the normal
presentation list. You will need to select ‘Archived’ or ‘All (Inc. Archived)’ as a status filter (see
above).
Archived: The presentation is considered ‘not active’ and is not seen in the normal
presentation list. You will need to select ‘Archived’ or ‘All (Inc. Archived)’ as a status filter (see
above).
![]() View button: Launches the web view of the presentation in a new browser window or tab
View button: Launches the web view of the presentation in a new browser window or tab
![]() Settings button: This allows you to change the metadata for the presentation. See section 2.2. If this button
is greyed out then you do not have permission to access this function.
Settings button: This allows you to change the metadata for the presentation. See section 2.2. If this button
is greyed out then you do not have permission to access this function.
![]() Edit Slides button: Allows you to edit the content of your presentation. See section 2.3.
Edit Slides button: Allows you to edit the content of your presentation. See section 2.3.
![]() Access button: This is where you set the access permissions for your presentation. See
section 2.4. If this button is greyed out then you do not have permission to access this function.
Access button: This is where you set the access permissions for your presentation. See
section 2.4. If this button is greyed out then you do not have permission to access this function.
![]() Delete button: Allows you to delete the presentation from the system. Be careful this
action cannot be undone. If this button is greyed out then you do not have permission to access this
function.
Delete button: Allows you to delete the presentation from the system. Be careful this
action cannot be undone. If this button is greyed out then you do not have permission to access this
function.
‣ 3 Create presentation/ Settings page
The same page is used to either create a new presentation, or to modify the settings of a presentation you have made previously.
Title: The title of the presentation
Theme: The chosen theme for the presentation. When you create a presentation you must first choose the correct branding that the slides’template should use. This will be the same for any ‘new’ slide you create within that particular presentation – templates can only use one theme in any one presentation. However, any ‘child’slides that are copies from another ‘parent’ presentation and attached via thelibrary presentation will keep their original theme.
N.B.Please do not try to use the PDF theme – you will get unexpected results – this theme is for administrators only
Presentation category: Select a category for your presentation. N.B. Depending on your permissions level – some users may not have access to the category selector.
Description: This is the description that will come up in the ‘About’ box on the iPad. It will also appear as the description next to the presentation when you send an email.
Cover Thumbnail: Upload the image you want as the presentation thumbnail. If you don’t do this – the system will create one for you – based on the first slideofthe presentation.
Promote to library: This checkbox will promote the presentation to the main iPad library. If you do not select this checkbox the presentation will be in the ‘User’ library of whoever you have logged in as. Only system admins can ‘Promote to Library’.
Exclude from sendable items: This checkbox removes the presentation from the list of presentations that can be emailed via the systems in-built email function.
IMPORTANT: You must make sure to click the green save button ![]() before you navigate away from the
page or use the back button etc. If you do not save the page, all the information you have entered or edited
will be lost.
before you navigate away from the
page or use the back button etc. If you do not save the page, all the information you have entered or edited
will be lost.
‣ 4 The edit presentation page
N.B. Depending on your permission level to each particular presentation, you may not have access to all the functions listed below and certain icons might be ‘greyed out’ or not visible.

![]() Generate
thumbs button: Use this button to generate a new thumbnail for each slide that is selected.
Generate
thumbs button: Use this button to generate a new thumbnail for each slide that is selected.
![]() Delete button:
Deletes the selected slides.
Delete button:
Deletes the selected slides.
![]() View
presentation button: View the whole presentation in a new browser window, or tab.
View
presentation button: View the whole presentation in a new browser window, or tab.
![]() Position drag handle: Allows you to drag the slide into a new position.
Position drag handle: Allows you to drag the slide into a new position.
 Thumbnail: Slide thumbnail. Click to preview the slide.
![]() Select checkbox: Allows you to select a slide (or multiple slides) and generate a thumbnail
for it, or to delete it.
Select checkbox: Allows you to select a slide (or multiple slides) and generate a thumbnail
for it, or to delete it.
![]() View button: View the individual slide in new browser window or tab.
View button: View the individual slide in new browser window or tab.
![]() Edit button: Allows you to edit the slide. If the edit icon is greyed out then you do not have permission to
edit the slide. This will be because (a) you are viewing a presentation that someone else has created and
they have not given you permission to do this, or (b) you have inserted a slide via the ‘+ Library slide’
selector(see ‘+ Library slide’ selectorbelow).
Edit button: Allows you to edit the slide. If the edit icon is greyed out then you do not have permission to
edit the slide. This will be because (a) you are viewing a presentation that someone else has created and
they have not given you permission to do this, or (b) you have inserted a slide via the ‘+ Library slide’
selector(see ‘+ Library slide’ selectorbelow).
![]() Delete Button: Deletes the slide. Be careful this action cannot be undone.
Delete Button: Deletes the slide. Be careful this action cannot be undone.
 + New
slideselector: Allows you to create a new slide based on one of approx. 40 system templates. When you click
this button you will be taken to a page where you can choose the template you need.
+ New
slideselector: Allows you to create a new slide based on one of approx. 40 system templates. When you click
this button you will be taken to a page where you can choose the template you need.
An example row from the ‘Choose template’ page is below:

Templates are grouped into categories i.e. Title and structure slides / Bullet point slides / Text & image slides etc. Click on the category name to expand the selection. Or use the ‘Toggle All’ link to expand all the categories at once.
Each template is referenced by a thumbnail that shows typical slide content and layout. If you hover over the thumbnail a ‘See Example’ view button will appear. Click the view button to see an indicative example of the kind of slide that this template is designed to produce. When you have decided which template you would like to use, click on the + Select button. You will be directed to creation page for that template.
To create your new slide, simply fill out all the required information in the form provided. Use the tooltips
![]() provided on the page to help you with this process. You can use the blue preview button
provided on the page to help you with this process. You can use the blue preview button
![]() to view the
slide as you go about creating it.
to view the
slide as you go about creating it.
IMPORTANT: You must make sure to click the green save button ![]() before you navigate away from the
page or use the back button etc. If you do not save the page, all the information you have entered will be
lost.
before you navigate away from the
page or use the back button etc. If you do not save the page, all the information you have entered will be
lost.
When you save the new slide it will be inserted into your presentation at the position in the slide order where you clicked ‘+ New slide’.
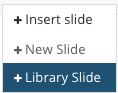 + Library
slide selector:Allows you to insert a pre-existing slide from the library into your presentation. When you
click this button you will be taken to a new page where you can select a slide (or slides) from any
presentation in the system that you have access to.
+ Library
slide selector:Allows you to insert a pre-existing slide from the library into your presentation. When you
click this button you will be taken to a new page where you can select a slide (or slides) from any
presentation in the system that you have access to.

Choose a presentation by using the ‘Select presentation’ section. This section is like a small version of the main page and has the same search and filtering functionality. Click on one of the presentations to choose it. Once you have made your selection, thumbnails of the slides in that presentation are revealed. Simply tick the checkbox of the slide (or slides) you want to add. You can preview the slides by clicking on their thumbnail.
When you have made your choice, click the ‘Insert slides’ button ![]() . The system will insert the
selected slide(s) into your presentation at the position in the slide order where you clicked ‘+ Library
slide’.
. The system will insert the
selected slide(s) into your presentation at the position in the slide order where you clicked ‘+ Library
slide’.
PLEASE NOTE: When you add a slide(s) to a presentation via the ‘+ Library slide’ method, they are added as
‘child’(or copy) slideof the original ‘parent’ slide,and are not editable. You will see an icon ![]() that indicates this.
Childslides retain a linkage to their originalparentslide with an original/ copyrelationship. If you hover
your mouse pointer over the icon you will see a tooltip that references the name of the master presentation
that the slide belongs to. You should be aware that if the owner of the presentation (usually your system
admin) edits the parentslide, it will also edit your childcopy. This is intended behaviour.
that indicates this.
Childslides retain a linkage to their originalparentslide with an original/ copyrelationship. If you hover
your mouse pointer over the icon you will see a tooltip that references the name of the master presentation
that the slide belongs to. You should be aware that if the owner of the presentation (usually your system
admin) edits the parentslide, it will also edit your childcopy. This is intended behaviour.
You can also search for an individual slide by title, use the ‘Search slides’ box.
‣ 5 The presentation access page
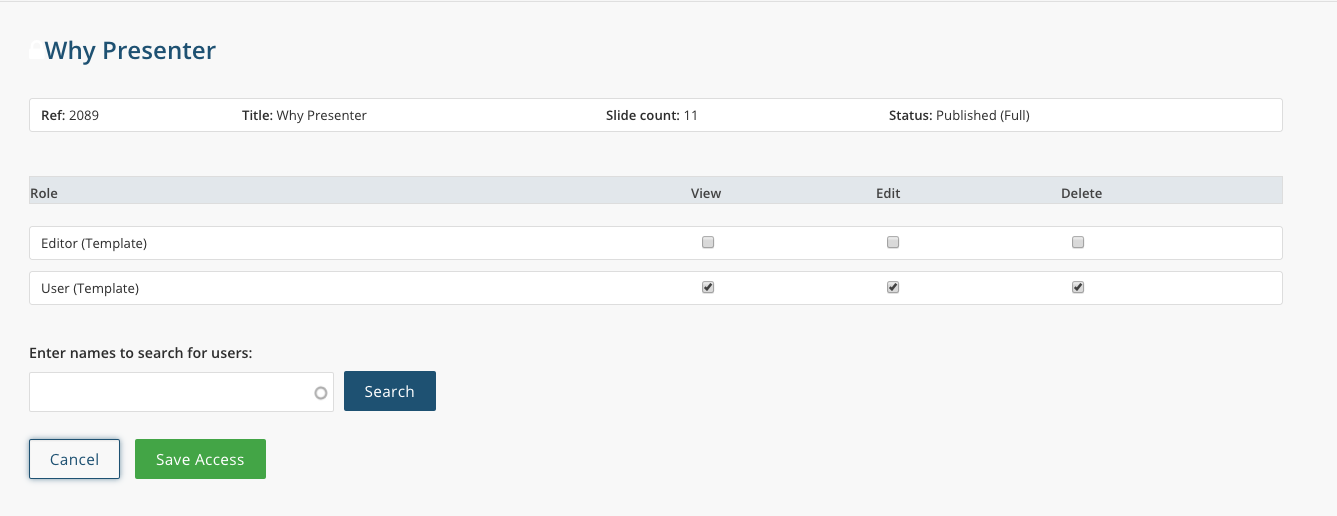
By default, when you create a presentation only you and your administrator will have access to it. If you would like to give access to a colleague then you need to use the presentation access page.
To do this, enter the name of the user you would like to give access to in the search box and click the
search button ![]() . You don’t need to know their full username as the search will find any user who has the
characters you have entered in their name.
. You don’t need to know their full username as the search will find any user who has the
characters you have entered in their name.
To give users the ability to view the presentation tick the ‘Keep’ checkbox and the ‘View’ checkbox.
If you would also like to give them permission to edit or delete the presentation, you must also tick the ‘Edit’ or ‘Delete’ checkbox.
IMPORTANT: You must make sure to click the green Save Access button ![]() before you navigate away from
the page or use the back button etc. If you do not save the page, the changes you have made will be lost.
before you navigate away from
the page or use the back button etc. If you do not save the page, the changes you have made will be lost.
‣ 6 Documents library
There are 2 sub menus within this section – the ‘List ‘page and the ’Upload document’ page. Use the ‘List’ page to manage current documents within the system and the ‘Upload’ page to create new documents within the system.
The documents library functions in a very similar way to the presentations library. However instead of creating new content within the system you are simply uploading an existing document from your computer.
When you create a document in the system you are essentially creating a document ‘container’ that references a separate file. The ‘container’ can stay the same, but the file that it references can change. In this way you can update a document simply by uploading a new reference file. The ‘container’ title, description & category can stay the same.
![]()
THE SEARCH / FILTERING BAR
Search title or ID: Search for documents by title or ID reference
Author: Allows you to search for documents by their author.
Category: Choose which content category you wish to filter the documents by – you will only see categories for which you have access rights.
Status: This is the Publish status of the document. Choose an option to only see documents that have that status:
– All
– Published (Full)
– Published (Web)
– Not Published
– Archived
You need to click the ‘Apply’ button to action the filtering. Use the ‘Reset’ button to cancel the filtering.
THE DOCUMENT LIST ROW
Title: Shows the title of the document, its reference number, its file name, its file type and its file size.
Publishing status selector:
![]() Published (Full): This publishes the document for web download and also makes it available
for download on the iPad.
Published (Full): This publishes the document for web download and also makes it available
for download on the iPad.
![]() Published
(Full): If the tick icon is orange then the content is still Published (Full), but the orange colour
indicates that there has been a content update since the last time the document was published. Most likely
the file associated with this document has changed. In this case the latest version of the document is not
currently available to download to the iPad.
Published
(Full): If the tick icon is orange then the content is still Published (Full), but the orange colour
indicates that there has been a content update since the last time the document was published. Most likely
the file associated with this document has changed. In this case the latest version of the document is not
currently available to download to the iPad.
![]() Published (Web): This only publishes the document web download. It is not available for iPad
download.
Published (Web): This only publishes the document web download. It is not available for iPad
download.
![]() Not Published: In this situation the document is considered ‘active’ (being edited) – but it
is not published to the web or available for download.
Not Published: In this situation the document is considered ‘active’ (being edited) – but it
is not published to the web or available for download.
![]() Archived: The document is considered ‘not active’ and is not seen in the normal presentation
list. You will need to select ‘Archived’ or ‘All (Inc. Archived)’ as a status filter (see above).
Archived: The document is considered ‘not active’ and is not seen in the normal presentation
list. You will need to select ‘Archived’ or ‘All (Inc. Archived)’ as a status filter (see above).
Select the required publishing state and follow the instructions.
![]() Download button: Downloads the file to your computer.
Download button: Downloads the file to your computer.
![]() Edit button: Takes you to a new page which allows you to change the file associated with the
document. You can also change the title, description and the document category. This is same page that you
used when you created the document using the Upload document page. Please remember to Save
Edit button: Takes you to a new page which allows you to change the file associated with the
document. You can also change the title, description and the document category. This is same page that you
used when you created the document using the Upload document page. Please remember to Save ![]()
![]() Access button: Takes you to a new page where you set the access permissions for your
document. This is the same procedure as giving access to a presentation (see section 2.4). If this button is
greyed out then you do not have permission to access this function. Remember to Save
Access button: Takes you to a new page where you set the access permissions for your
document. This is the same procedure as giving access to a presentation (see section 2.4). If this button is
greyed out then you do not have permission to access this function. Remember to Save ![]()
![]() Delete button: Allows you to delete the document from the system. Be careful, this action
cannot be undone. If this button is greyed out then you do not have permission to access this function.
Delete button: Allows you to delete the document from the system. Be careful, this action
cannot be undone. If this button is greyed out then you do not have permission to access this function.
‣ 7 Emails
You can send presentations and documents directly from the system via email. When the recipient clicks to view a presentation, or download a document, the system will send you an email notification that this event has happened. You will then be able to login to the CMS to see more details of your recipients viewing session.
LIST (sub menu)
On this page you can see all the emails that you have sent via the system. There is a simple search filter that allows you to search for sent emails by the recipient’s’ name – or by the subject of the email.

Along with other information (such as date sent) there are the following buttons:
![]() View Info: Allows you to view diagnostic information about the email and its content. This
includes:
View Info: Allows you to view diagnostic information about the email and its content. This
includes:
– The sent status of the email.
– Statistical data relating to how many times the recipient has viewed the presentations, including the length of time spent on each slide. Also if the viewer has downloaded any documents that were sent.
– The unique URL created by the system for each presentation or document sent.
– A copy of how the email looked when it was sent, including all text.
![]() Send as
New: Sends a previously constructed email – but allows you to change the recipient.
Send as
New: Sends a previously constructed email – but allows you to change the recipient.
![]() Resend: Sends
a previous again to the same recipient.
Resend: Sends
a previous again to the same recipient.
SEND NEW (sub menu)
This is where you construct your email to send to a client. The email allows you to send links to both online presentations and downloadable documents. The email is very small in file size as there are no attachments – just links – therefore it is possible to send large presentations and documents without needing to worry about the recipients email attachment size limitations.
To send the email, simply fill in the required fields of the form provided. There are tooltips ![]() to
help you do this.
to
help you do this.
You can also use the Preview button ![]() to see a pop up window, which also shows how the email will look.
to see a pop up window, which also shows how the email will look.
Within the Settings drop down menu – the ‘Send email notifications’ checkbox allows you to decide whether you want to receive email notifications when content of the email is viewed or downloaded. This section also allows you to send a test email to yourself, or a colleague first – to check how it looks. Also in this section, you can leave a note, for reference purposes.
IMPORTANT: the signature of your email is prefilled with the details from your account profile. To edit your
profile, click on the ‘cog’ icon ![]() and select ‘My Account’
and select ‘My Account’ ![]() .
.